
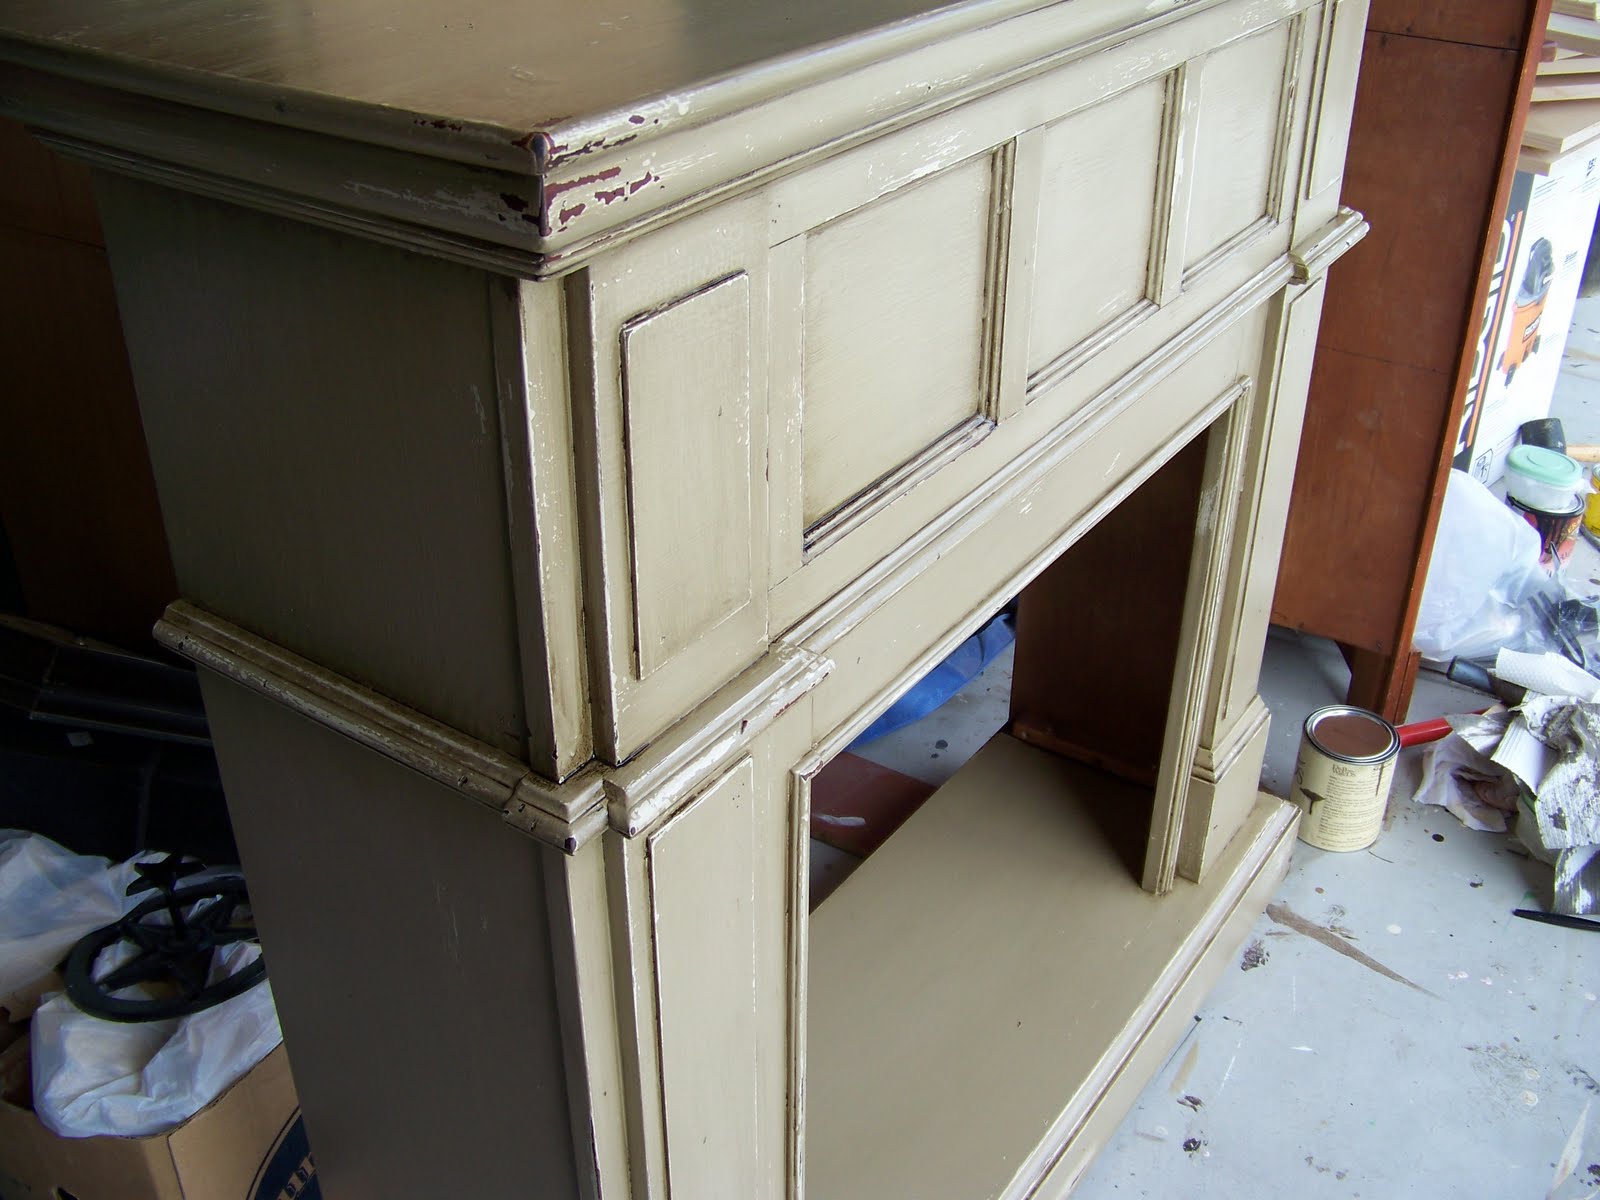
Yes, it is finally finished...I can hardly believe it myself!!! And I must be CRAZY for showing these awful pictures but, here is a sneak peak anyway...These pictures were taken in my garage with terrible lighting so it is really hard to see the true paint color ( more of a taupe/khaki) and finish. As soon as it is moved into the master bedroom, I will take and re post new ones.
As far as the finish goes...I love it! As I stated in an earlier post, I was trying a new technique and was a little worried about it and although, it isn't exactly like the Caromal Colours finish, I am very pleased.
So, how did I do it??
- I sanded, cleaned and prepped it.
- I cut to size Luan (very thin wood) and wood glued it to cover the more ornate details along the front sides - it was a little too fancy for me.
- I then wiped Minwax Paste Wax over the areas where I wanted the wood to show through after the final sanding ( it helps to make the paint look like it is "chipping" off).
- I "smooshed", "glopped" on or whatever you want to call it, the first coat or base coat of paint. I used Linen milk paint by General Finishes. You can find it on the Internet or Four Chairs in Lindon, Utah. *It actually looked like I had let my kids paint it!
- I then brushed 2 more coats of the same Linen paint to make sure I had even coverage.
- I applied another round of paste wax to the areas where I wanted the base coat to peak through from under the topcoat.
- I then put 2 coats of the topcoat Rittenhouse Ivory by Old Village Paints, again from Four Chairs.
- After it had dried and "cured" for a day or 2, I sanded and distressed it using a hammer and nail to make "worm holes" and "nicks and dings" paying particular attention to where normal wear would occur. I really wanted this to look like it had been around for a long time and had several layers of paint underneath.
- I applied Old Dad's Old World Stain like a glaze...leaving it in all the "nooks and crannies" to make it look old and aged.
- Finally, I put 3 coats of General Finishes polyurethane on for added protection.
Before: 
After:


I'm linking to:
http://www.poppiesatplay.blogspot.com/
http://www.missmustardseed.blogspot.com/
http://www.theshabbychiccottage.net/
http://lifeaslori.blogspot.com/
http://romantichome.blogspot.com/
http://toolsareforwomentoo.blogspot.com/


I'm linking to:
http://www.poppiesatplay.blogspot.com/
http://www.missmustardseed.blogspot.com/
http://www.theshabbychiccottage.net/
http://lifeaslori.blogspot.com/
http://romantichome.blogspot.com/
http://toolsareforwomentoo.blogspot.com/


It looks perfect, great finish and I love the color.
ReplyDeleteIt looks great April! And you finished it while sick with strep?! You are amazing.
ReplyDeleteThat's a huge amount of work but a super result. Bet you'd fool an antique dealer. Jane F
ReplyDeleteWow! It's GORGEOUS!! Great painting tips! I'll have to try the minwax before hand. I LOVE the results!! You have strep?!? So sorry to hear that! Get better soon!!
ReplyDeleteThat looks amazing! I can't wait to see it in your bedroom! I found you on Poppies at Play.
ReplyDelete<3
Risa
Very, very cool! I refinish furniture as well, so I was happy to find your blog! -shaunna :)
ReplyDeleteWowzer! That is the best faux aged job I have seen on the web. It was well worth all of the work! I will be bookmarking this post to use for future projects. Thanks a bunch....hope you are feeling better. One more thing.....you may have a new blog but it is obvious that you are not new to refinishing.....and if you are I am jealous!!
ReplyDeleteI snagged a couple pics to feature you today on Creative Cats. Hope that's alright!
ReplyDeleteAndy, absolutely!! Thank you so much :). I probably should change that "permission" a bit?? What do you do about that?? Thanks
ReplyDeleteThat is so beautiful! It will be so romantic in your bedroom!
ReplyDeleteThis turned out gorgeous! I want one! Good job!
ReplyDeleteOh I love it. I think everything looks better white!
ReplyDeleteVery pretty girl...hugs and smiles Gl♥ria
ReplyDeleteNice project. I would love it if you would link this up in Modern Craftswoman Monday. Very well done. Rory
ReplyDeleteLove love love this finish. Just amazing!
ReplyDeleteI'm SO wanting to try a really distressed and layered piece like this one. Thanks so much for the tips! Looks picture perfect!
ReplyDeleteI think it's great to put something as far as permissions go. You at least want to know who's showing your stuff. Of course people won't pay always pay attention, but it's good to try:)
ReplyDeleteThat looks incredible, what an amazing job! Found you through csi.
ReplyDeleteThat is AMAZING!!!! We have the same style--anything "chippy" is totally my thing. I love to refinish furniture, but you have definitely taught me a few things. Fantastic job!!!
ReplyDeleteThat looks so authentic. Gorgeous! Just like something out of Country Living or Veranda. Kudos.
ReplyDeleteI cringed when I read you were going to use Luan to cover the details. I mean who wants to cover details? OH, was I so ever wrong! The FP is actually MORE interesting with the Luan. You have created a treasure!
ReplyDeleteThanks for linking and making this the most successful Modern Craftswoman Monday so far! Rory
ReplyDeleteI love it! You did a great job on the finish!
ReplyDeleteOh my goodness - this is gorgeous. It has totally inspired me to get my fireplace finished.
ReplyDeleteWow - this is just amazing. I love how chippy it is and the color is fantastic! Great job!
ReplyDeleteThanks so much for linking up to the CSI Project! We really appreciate it. I hope you will come back next week for our Hardware Store challenge!
XOXO
Jen
Great Job!!! It looks way better white, thanks for sharing. I saw your link on Sunday Showcase and I am your newest follower! Nice to meet you. Have a great Memorial Day weekend!
ReplyDeleteBonnie
Hi! I'm stopping by from Beneath My Heart. What an AMAZING job! Your fireplace is absolutely gorgeous!
ReplyDeleteWhat an amazing transformation! I love the finish. Fabulous job! Thanks for joining the Sunday Showcase! I greatly appreciate it! ~ Stephanie Lynn
ReplyDeleteHi April! Just wanted to let you know I'll be featuring your Mantle later today! Stop by and grab a featured button if you like. Thanks again for linking to The Sunday Showcase! Hope to see you again next week. ~ Stephanie Lynn
ReplyDeleteI just dropped over from Beneath My heart & Im so glad I did. I love your mantle & look forward to seeeing pics of it in place.
ReplyDeleteCheers
I missed the first post on this mantle.. so I'd like to ask.. where did you get it, or was it yours, you took it down and finished it? I just love it and am really interested because I'm in the process of building such a mantle for a faux fireplace..Thanks so much for the detailed instructions on the finish!
ReplyDeleteSandy
thewondersofdoing@blogspot.com
Wow! That looks great! I can't wait to see it installed. Thanks for linking up to Sister Sister!
ReplyDeletehttp://blog.kuzakscloset.com/