A Blog about Furniture Refinishing and Home Decorating


Thursday, May 27, 2010

We've been framed...

I have been wanting to frame our family pictures that we had taken nearly a year ago for a while...GASP!!!! Although, I needed 5 frames and I found some that I really liked at Four Chairs (http://fourchairsunfinishedfurniture.com/art1.html) but at around $79.00 a piece that is waaaaay over of my budget!! So, I had the lovely guys at the Wood Connection make me these frames for $20 a piece ( the overall size is about a 25 x 25 frame with a 12 x 12 opening). I then went to Home Depot and bought moulding to make them look a little more substantial and professional looking. My total cost for the frames and moulding came to $40 a piece...much better!!
Before...use this trusty guy to mitre your cuts...

wood glue, tape and heavy paint cans to attach the moulding


don't forget to putty your gaps/mistakes!!!
Then I painted them black, sanded, distressed (nails and hammer), stained and polyurethaned them.


After...


I still need to hang the other 4.
I love them so much I will be making a few more...


I'm linking to...
http://missmustardseed.blogspot.com//
http://www.remodelaholic.com/
http://www.poppiesatplay.blogspot.com/
http://www.bystephanielynn.com/
http://toolsareforwomentoo.blogspot.com/
http://shanty2chic.blogspot.com/
http://thriftydecorchick.blogspot.com/

Tuesday, May 25, 2010

Thank You, Thank You!!

Wow, today has been an Exciting and Fantastic day!!! Not only was I FEATURED on Remodelaholic (http://www.remodelaholic.com/) but I also received the Versatile blogger award from One Life Many Journeys ( http://onelifemanyjourneys.blogspot.com/). I was SOOOOO overjoyed I called my husband at work screaming in excitement...!! I am very honored and flattered to be recognized because this blog is still very new. I also greatly appreciate the many wonderful comments from all of you lovely ladies...they sure do help to make ones day :).
Well, from what I understand, I am to tell 7 things about myself and then pass it along to 15 other Versatile bloggers. Here goes...
  1. I am a 34 year old wife to my husband and a mother to 4 fantastic little boys!
  2. My oldest son is just 2 months older than my little sister!!! My parents had an oops baby in their 40's. Therefore, there is a 23 year gap between my two sister's...CRAZY!!
  3. I was born and raised in Ohio but now reside in Utah.
  4. I twirled baton from 1st - 12th grade and competitively most of those years.
  5. I never finished college and I am kind of glad I didn't because I would have hated my career.
  6. I am not very social...I actually like being alone.
  7. I like things to be very neat, clean and organized but, I hate to clean!!

Now, I am passing this along to the 15 that I follow and enjoy...(no particular order)

Please make sure to visit these inspiring ladies...they have so much talent!

Sunday, May 23, 2010

~random pics~

I am not quite finished with my latest project so...I thought I would share some of the things I have refinished for my own home. Unfortunately I didn't take any before pictures over the years because when I started re-doing furniture nearly 10 years ago I was usually in a hurry to begin a piece and then of course I didn't even know what a blog was back then -Oh well!!
So, here is my home...as much as I love all the beautiful "white's" that many people are decorating their homes with all over blog land... I am really drawn to color. Well, muted color that is. I decorate my home in a mixture of Farmhouse, Colonial and Early American Style. So, I love barn reds, creams, black, blues and mustard's. I also love anything that is "chippy" and looks to be over 1oo years old!
Enjoy...
~this holds some of my favorite crocks~

~I love fireplaces~


~cabinet~

~cookbooks~


~grandfather clock~


~child's bench~

~nightstand~

~end table~


~Kiddo's step stool~

~sign~

~message board~


~door~
~peg rack~


Thursday, May 20, 2010

~update~

It is in and let me tell you...this thing was HEAVY!!! There was no way I could possibly wait for my husband to get home from work to help me so...I did it all by myself!!! Which is what I normally do anyway :) (I can't even begin to tell you the things I have carried and lifted while being pregnant - I know pretty stupid)! Well, although it nearly KILLED me going up a flight of stairs, I made it and I love it. And the best part is that it looks exactly how I had pictured it would and I am so thrilled. I do need to finish accessorizing it (project and pictures coming soon) and I need to paint the room but that is going to have to wait because there are a few more projects in line first...


Thursday, May 13, 2010

Finished!!!

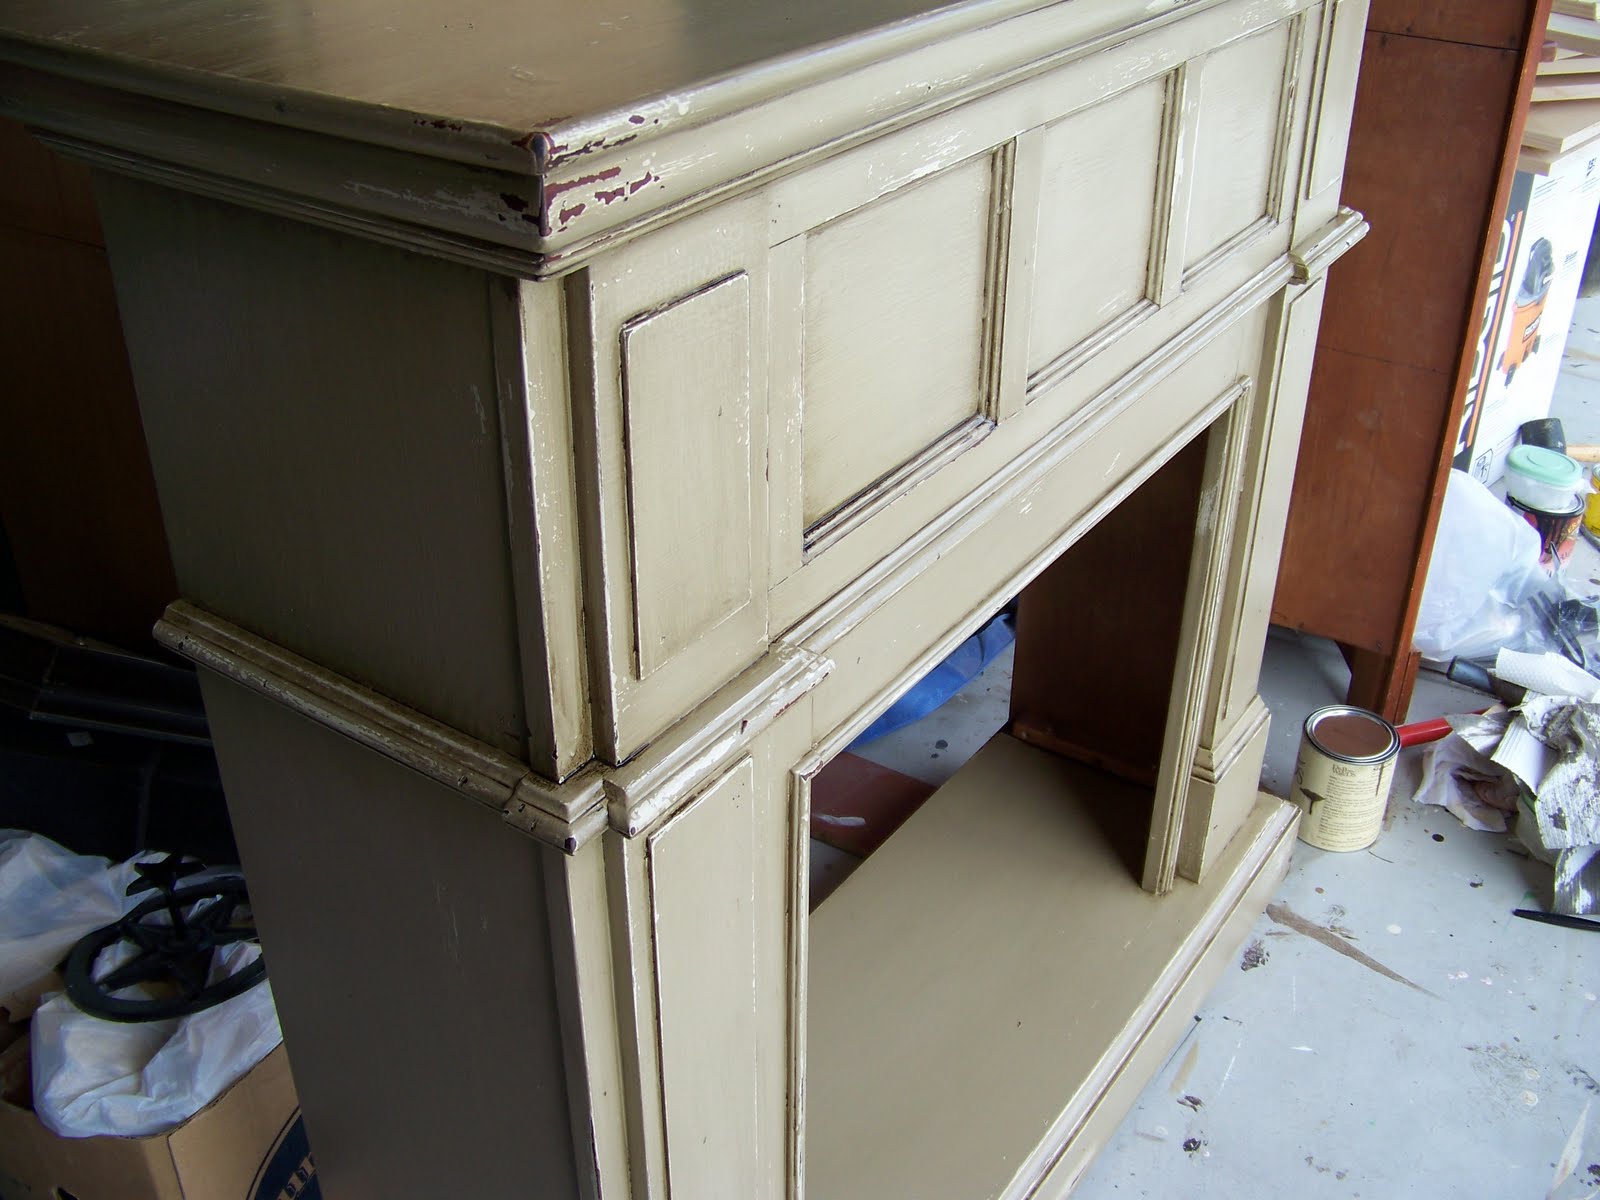
Yes, it is finally finished...I can hardly believe it myself!!! And I must be CRAZY for showing these awful pictures but, here is a sneak peak anyway...These pictures were taken in my garage with terrible lighting so it is really hard to see the true paint color ( more of a taupe/khaki) and finish. As soon as it is moved into the master bedroom, I will take and re post new ones.
As far as the finish goes...I love it! As I stated in an earlier post, I was trying a new technique and was a little worried about it and although, it isn't exactly like the Caromal Colours finish, I am very pleased.

So, how did I do it??

  1. I sanded, cleaned and prepped it.
  2. I cut to size Luan (very thin wood) and wood glued it to cover the more ornate details along the front sides - it was a little too fancy for me.
  3. I then wiped Minwax Paste Wax over the areas where I wanted the wood to show through after the final sanding ( it helps to make the paint look like it is "chipping" off).
  4. I "smooshed", "glopped" on or whatever you want to call it, the first coat or base coat of paint. I used Linen milk paint by General Finishes. You can find it on the Internet or Four Chairs in Lindon, Utah. *It actually looked like I had let my kids paint it!
  5. I then brushed 2 more coats of the same Linen paint to make sure I had even coverage.
  6. I applied another round of paste wax to the areas where I wanted the base coat to peak through from under the topcoat.
  7. I then put 2 coats of the topcoat Rittenhouse Ivory by Old Village Paints, again from Four Chairs.
  8. After it had dried and "cured" for a day or 2, I sanded and distressed it using a hammer and nail to make "worm holes" and "nicks and dings" paying particular attention to where normal wear would occur. I really wanted this to look like it had been around for a long time and had several layers of paint underneath.
  9. I applied Old Dad's Old World Stain like a glaze...leaving it in all the "nooks and crannies" to make it look old and aged.
  10. Finally, I put 3 coats of General Finishes polyurethane on for added protection.

Before:

Related Posts with Thumbnails